Paper models have been popular for a l-o-n-g time. The advent of inexpensive lithography techniques in the 1800s made paper buildings accessible to everyone. Here at Toys & Stuff Thursday's have kind of evolved into a paper models forum the past few months. I've spent the past several months featuring scans of the Marx paper Village which was included in some of their train sets. And then of course last week was the last scan of the Kellogg's UK Paper Village. I haven't yet assembled it but promise I will show it in all its built up glory hopefully before too long.
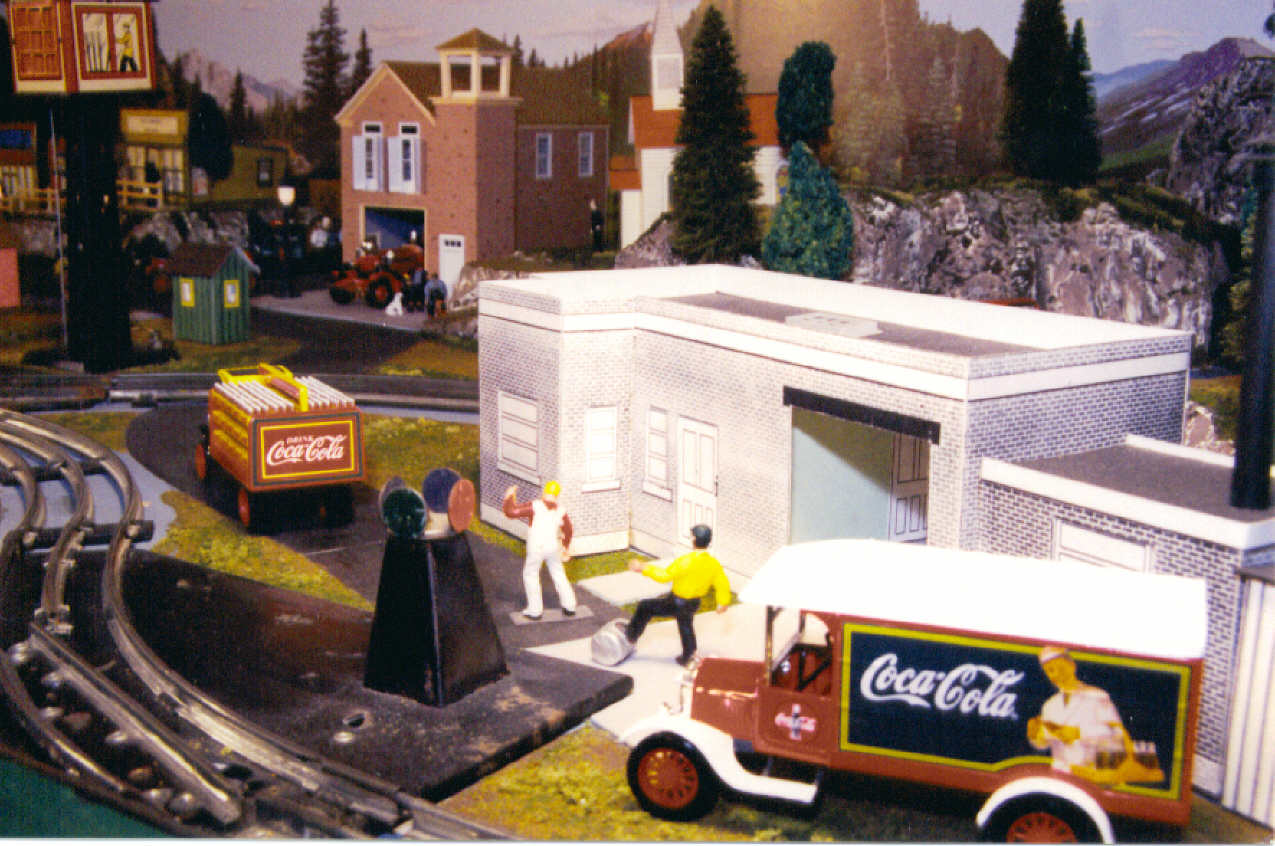
My first foray into paper models was back in 2000. I was stationed in S. Korea and during my down time I actually built a 3-rail O-gauge toy train layout. So as not to have to drag along a bunch of model kits with me I decided to build paper structures. They were all scanned from old issues of 'Toy Trains' magazine published by Hal Carstens. 'Toy Trains' magazine had a long running series of various structures and vehicles which were meant to be cut-out of the magazine and assembled. Fortunately not everyone who bought the magazines cut them up! Here's some photos of the models I had built back then:


The following is rather lengthy, and may be a tad bit overkill but I tried to make it as complete as I can so that a beginner can at least gather up supplies knowledgeably. Some things are optional. Most are fairly inexpensive which is what makes paper modeling an economic hobby. The biggest exceptions to this are the cost of printer ink or the cost of commercial kits.
Tools & Techniques
The photo below shows most of the
tools I use to build paper models.

Paper
Some form of ‘heavy’ paper. It may
be listed as ‘card stock’ or ‘cover stock’ and is designated by weight.
Anywhere from 44lb up to 110lb weight will be good material for use in building
paper models. A matte, double sided paper will allow you to use markers without
significant bleed-through of the color into the paper.
I had been using a couple of reams
of 110lb cardstock that I’d had on hand for some time. The paper was sturdy
enough to require minimal bracing. My most recent acquisition is Staples 65lb
cardstock in a bright white. So far it seems to be holding up well. One point
to make: If you’re going to do a lot of printing remember that over time, the heavier
material might wear out your printer sooner as it will cause more
strain on the mechanism.
Photo
Paper
Some modelers (those who model
structures) prefer to print their projects on self-adhesive photo paper. They
print the image, peel off the paper backing, attach the image to cardboard,
then carefully cut out the wall, roof, etc, and assemble the model. This method
is great when you’re trying to achieve the look of tin-litho buildings because
you get that real neat shine.
Glue
‘Aleene's Tacky Glue’ is recommended
by some modelers as it holds quickly, and dries with a solid, clear bond.
‘Schreiber-Bogen’, the German manufacturer
of some of the finest paper model kits you’ll see anywhere, recommends ‘Uhu’
brand glue. This can be tricky to find though in many parts of this country.
Here’s a quote from “The Haggard”
courtesy of the ‘PaperVilleUSA’ Yahoo Discussion Group:
“I find that the white school glue (high quality brands) and the
carpenter's wood glue from a good hardware store and usually both the same PVA
glue with minor differences (usually in the water medium and sometimes in the
addition of a wetting agent to enhance penetration). Any white glue can be made
into tacky glue with a little air time on the palate before use. Your mileage
may vary. But I have found even the cheapest white glue to be better for paper
models than any of the cements, water glues, epoxies, etc. That is, as a
balance between cost, binding, workability, availability, safety, etc., etc.,
etc. Uhu is good as a binder, perhaps the best... but workability and cost are
not as good. However, when it comes to Uhu stick glue, there is NONE better
IMOHO. Everyone's favorite, Aline's (sic) Tacky Glue just isn't available
everywhere. But school or shop PVA just about grows on trees.”
The Group also recommended ‘Scotch
Quick Dry Tacky Glue', which holds well but doesn’t have much of a working time.
Me personally, I’ve been using
plain-Jane white school glue. It’s done well for me (and is shown in the photo)
but based on what I’ve read I believe a change is gonna come!
Markers
Many people like to cover unwanted,
exposed areas of white on their models, like the edges of roofs and such. To
hide these areas try to use non-bleeding black markers like "Flip Chart
Markers". Test the markers on a scrap first. Markers can be used for other
things as well. For example, I recently built an Old West Saloon and scratch
built the porch with strip wood. Normally I would have painted the wood but
thought I’d try color markers. Mine were from Crayola and did a nice job for
something that was only meant to be a quick-&-easy project.
Tweezers
I forgot to put these in the picture
but they’re indispensible when building a model with small parts. A variety of large and small tweezers will come in handy. Needle-nose, self closing
tweezers are great as clamps for holding together glued tabs. Especially those
in hard to reach areas.
Cardboard/Poster
Board/Newspaper
Anything to cover your work surface!
Not everyone has the luxury of a hobby room or spare room in which to work.
This means that often times work is gonna be done on the kitchen table! Even
old guys like me who don’t have to worry about the wrath of parents still need
a place to work. Yes, I do have a garage, and I do have a workbench so in that
regard I’m fortunate BUT, the garage (aka Man Cave) is not air conditioned
making working conditions in the summer less than optimal. And yes, it helps to
have a supportive spouse!!!
Cutting
Mat
I use a self-healing cutting mat
made by Fiskars as my cutting surface. It wasn’t horribly expensive (about $10
for a 12” square mat) but they last forever, and they will protect your table
(if you’re not using other protection), and extend the life of your blades!
Eye
Protection
This is imperative! Please use eye
protection when using cutting blades! The tips are very fine and prone to snapping
off under stress. And, Murphy’s Law will dictate they will fly where you do not
want them – like in the eyes!
Scissors
I use scissors for two different,
but primary, applications. First, I use them to cut the outside edge of tabs,
areas that don’t necessarily have to be perfectly straight because they’ll be
out of sight when glued-up. I do this to save wear-&-tear on the knives.
Knife blades are expensive so why wear them down unnecessarily? Scissors will
last much, much longer. Secondly, a couple of different small scissors are
extremely helpful for cutting small parts.
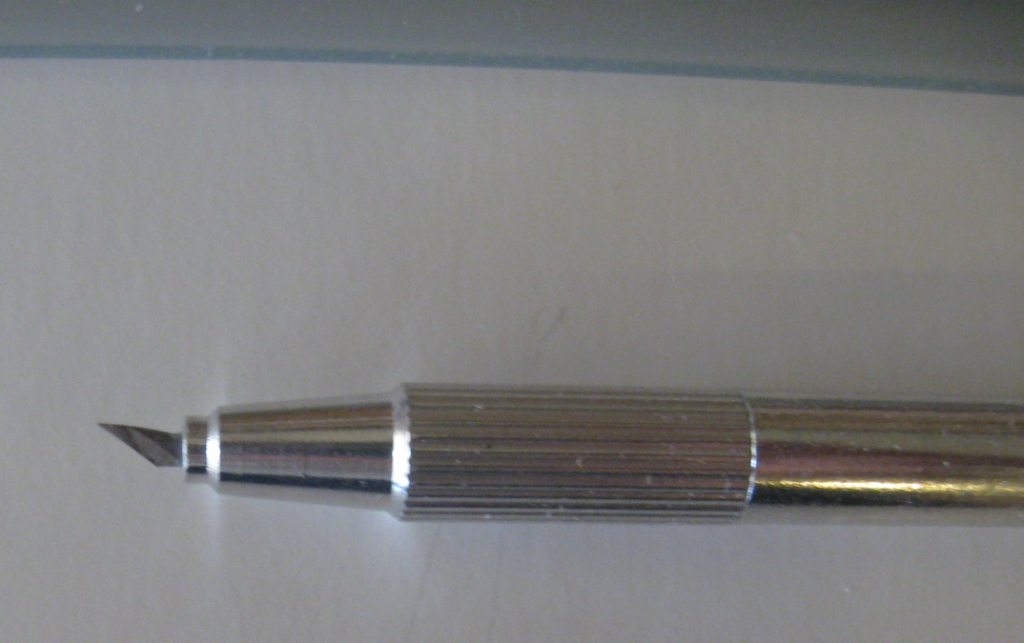
Hobby Knives
Hobby knives are now ubiquitous.
There was a time when people only had scissors and pocket knives (or ‘jack
knives’ as we used to call them). It’s a kick looking at model train magazines
from the 1930s & 40s that show modelers using pocket knives to cut things
that today we would use hobby knives
for. ‘X-Acto’ brand blades are readily available. ‘Testors’ also markets a
hobby knive that uses the same standard #11 blade. When new, they are EXTREMELY
sharp! BE VERY CAREFUL!!! Dull blades should
be replaced as they make cutting more difficult and increasing the risk of
injury at worst, or making for a crummy, ragged cut at least.
Fiskars makes a nifty hobby knife
with a very small swivel blade. It’s marketed for scrap bookers but is
eminently handy for our purposes as well. It takes a little getting used to but
I have found it to be helpful.

Another option for cutting, in lieu of hobby knives, is single-edge safety razor blades. On the up-side, they're cheaper than replacement hobby knife blades. They're just as sharp and cut just as well but do pose a slightly higher risk of accident if used without a holder. BE CAREFUL! BE CAREFUL! BE CAREFUL!
Square
Machinists, draftsman, and other
types of squares are a big help in keeping things, well, squared!
Toothpicks/Popsicle Sticks
It helps to have a means of applying
the glue to the model other than your fingertips! Although, I confess that I’ve
used that method as well! I’m a bad boy.
:-)
Ruler
A metal ruler is infinitely superior
to wood or plastic, both of which will get nicked up and distorted before you
know it.
Stripwood (Optional)
My method of building kits is to
print the image on heavy card stock, and brace the interior with strip wood.
Seems to work for me.
File (Optional)
If you use strip wood, the file
allows you to clean the edges of the wood.
Saw (Zip Saw) (Optional)
Used to cut the strip wood
Rags
Paper
towels, rags, whatever. You’ll be working with glue. Nuff said.
Some of The Steps I Use

Obviously I didn't have the poster board protecting the table - my bad!

Several projects in the works at one time

Marking the strip wood for cutting


The interior has been braced. This particular building took perhaps 30 minutes to complete
A Line-Up of Recently Built Models
Last month I spent an enjoyable week just working on paper models. These will never end up in a museum but it was nice chillin' out and working on hobbies. I set them up for a quick photo shoot on my layout, the Marxville and Plateau (The MaP). They're resting on bases I hastily made for a previous set-up - just heavy cardboard colored with Crayola markers and 'Sharpie' fine tip markers.


These two buildings were the design work of B.J. George, owner/moderator of the 'PaperVilleUSA' Yahoo Discussion Group. B.J. takes scans or color photos of buildings and creates .pdf drawings complete with glue tabs, people, signs, etc.

The car is approximately 1/43 scale

The figures are 35mm Marx

These buildings are from ice cream guru's Ben & Jerry's website:

The Trader's Cabin is by B.J. George and was made utilizing the photos of a Marx cabin that were posted right here on Toys & Stuff.

More Ben & Jerry's kits. I had not yet built the silo which goes with the barn.
The fire truck is a 1/64 scale Readers Digest die-cast fire truck which has been featured here on Toys & Stuff

(L) Another B.J. George 'kit' based on photos from Toys & Stuff
(M) A Fiddler's Green 'Jakes Saloon' kit
(R) B.J. George Trader's Cabin based on Toys & Stuff photos

Jakes Saloon with scratch-built porch
I built a framework for underneath the saloon and added bracing to the porch roof using strip wood. The wood was colored using Crayola markers and a little tan paint. All the white edges have been covered with a black 'Sharpie' magic marker. The saloon could use some more bracing.
I hope you've enjoyed this little look at the world of paper modeling. Enjoy!